

How To Make A Tileable Texture
Create stunning tileable textures in Blender
In this Blender tutorial, we'll give you a step by step guide to creating tileable textures in your 3D art using the tool's Dynamic Topology system. Blender offers some really nice sculpting tools, with a good Dynamic Topology system that enables you to generate geometry – as well as add and remove details. Although ZBrush's DynaMesh enables you to sculpt without constraint, you often still need to update your mesh in order to sculpt further.
Blender's Dynamic Topology sculpting, however, generates geometry on the fly, allowing you to increase or remove details on parts of your mesh, without needing to flood fill the model with the same volume of polygons; one of the big strengths of Blender's sculpting tools. It also includes a smooth tile system in Sculpt mode, which we'll be looking at this during the tutorial.
However, what I really want to take you through is my process for creating nice-looking, tileable textures in Blender. In particular, we'll be looking at how to create stylised wooden and stone tileable textures from sculpted surfaces.
Using a hand-sculpting method will allow us to bring a nice style to our tileable texture and also output all the different passes needed (ZPass, Normals, AO and so forth). This tutorial is an extract from my larger, in-depth workshop, The Cliff Tower course. If you're eager to get the full course, you can get it here with an exclusive 20 per cent discount using the coupon code: 3Dworld.
Download the files you'll need and accompanying video here.
01. Prepare the document
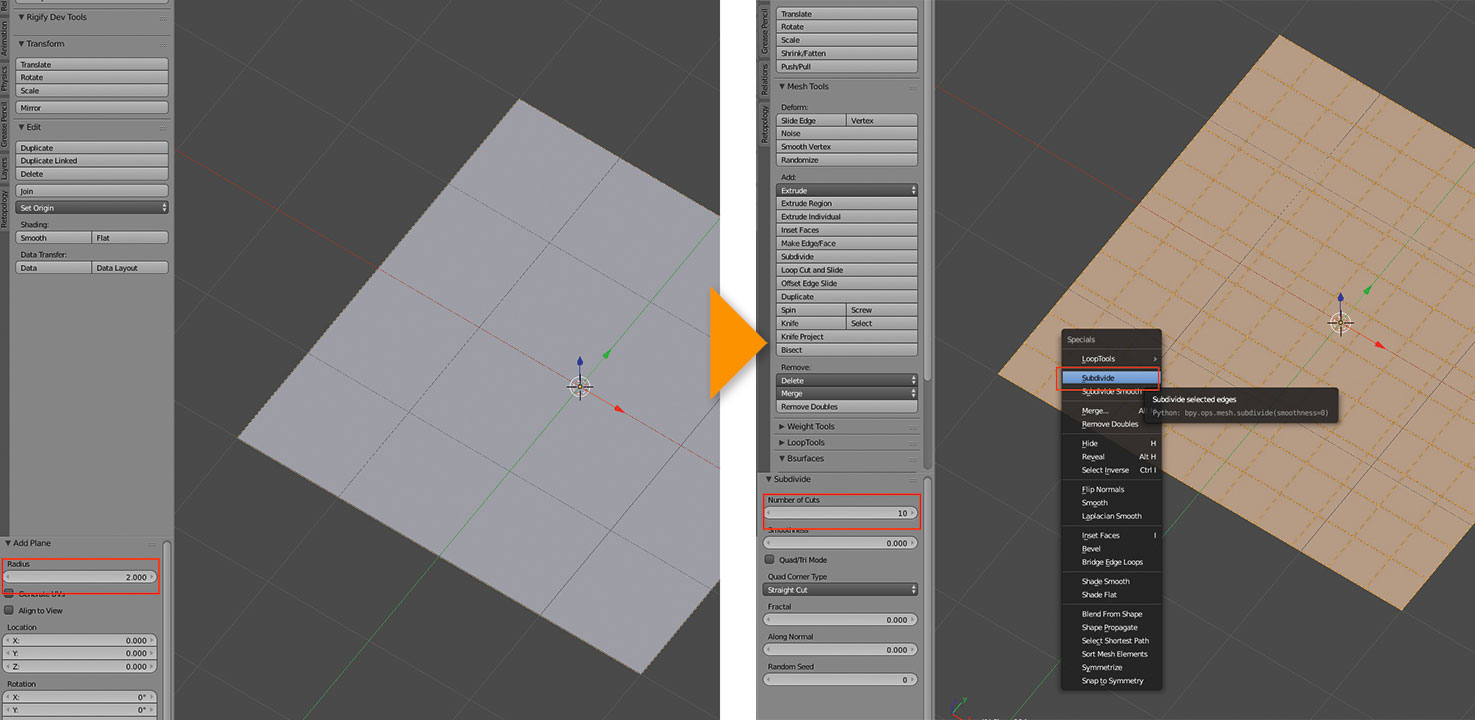
Create a new Blender file, remove every default element (camera, cube and point lamp) by pressing A then X, and confirm. With the 3D cursor snapped to the origin of the document (hold shift+S to centre), let's add a plane by pressing shift+A and set its radius to 2 so that we get a 4x4 Blender units plane.
Press Tab for Edit mode and press W, then from the menu, subdivide the plane a few times.
02. Get started with texture sculpting
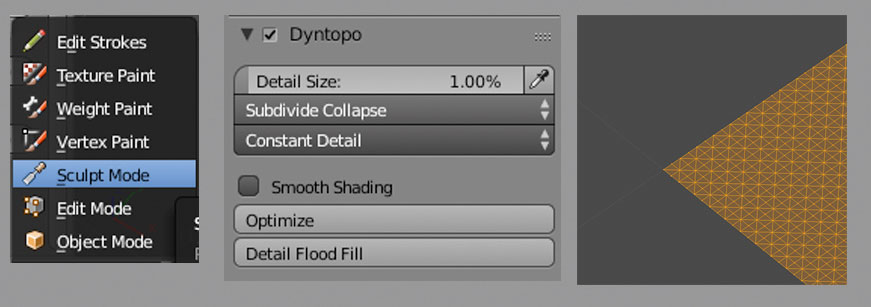
We can now go into Sculpt mode and enable Dynamic Topology by pressing ctrl+D. In the Tool panel on the left, using Constant Detail mode, we'll set the size to 1% and click Detail Flood Fill to get a high-density and homogeneous mesh.
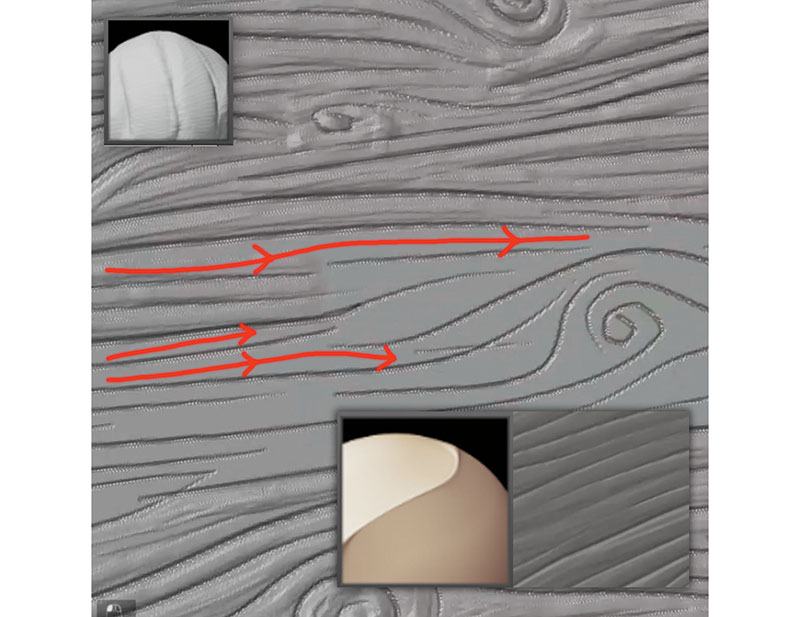
03. Create wood patterns
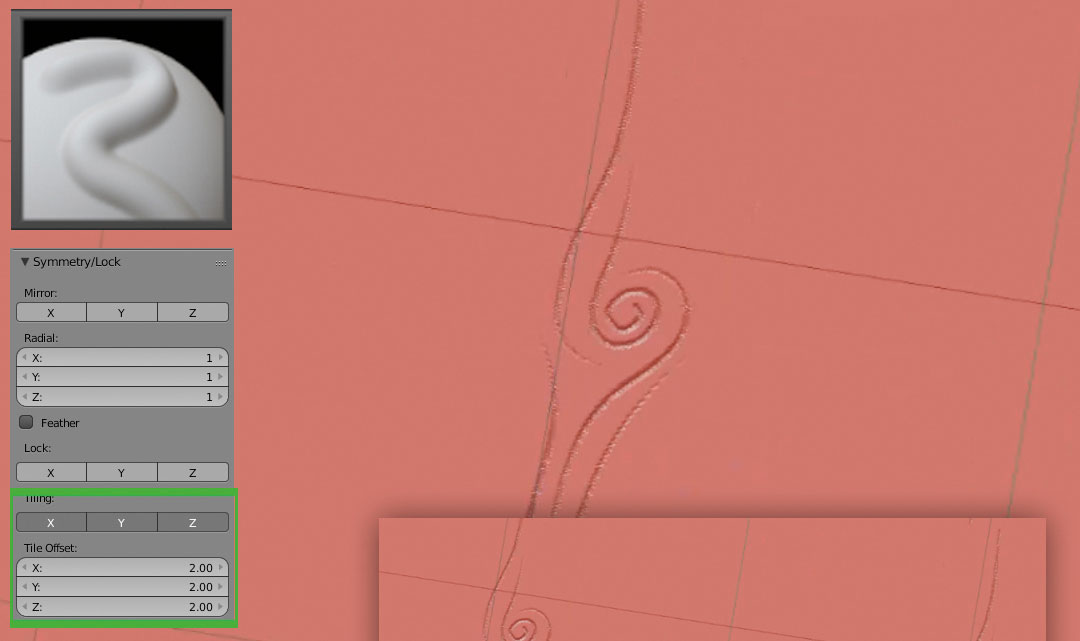
In the Symmetry option of the Tool panel, enable the tiling on all axes (X, Y ,Z) and use a tile size of 2. With the Draw brush, start carving the main wooden veins – your stroke automatically repeats on the surface with a constant offset outputting the tileable pattern.
Don't use the same pattern too much, and use a mix of curvy and straight lines. For more control enable the Smooth Stroke option.
04. Refine the sculpt
Once your pattern is done, use the Clay Strip brush to add thickness to the veins, following the wooden flow. The clay strips add interesting noise to the wood, making it more natural. You can refine this with the Pinch brush to achieve a nice fall off in the veins' tails, and sharpen the peaks and valleys. Disable Dynamic Topology for this final stage to stop Blender from collapsing the edges and creases.
05. Prepare the texture export
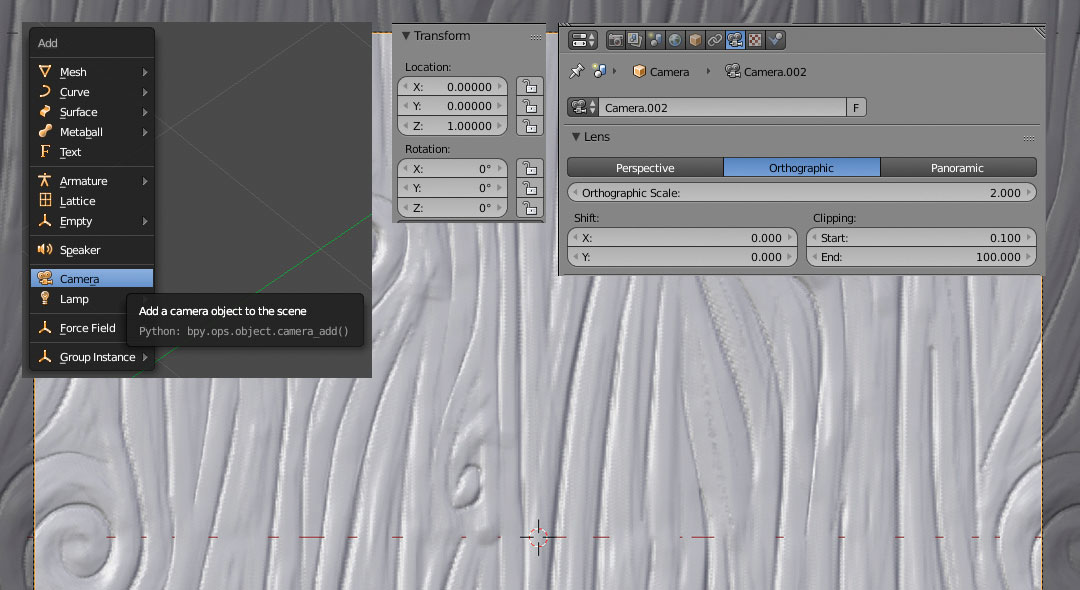
Instead of baking the textures from our sculpt, we will use a rendering process that avoids texture distortion that's a result of the projection. Now we'll add a camera by pressing shift+A, and set its coordinates to X:0, Y:0 and Z:1. In the camera's Options menu, found in the Properties panel, set it to orthographic with a size of 2. This will define our orthographic limits based on our sculpting tile size.
06. Set up your passes

Under 'Properties > Render Layers', enable the AO pass so we can export the combined Z and AO pass when rendering. In the Node editor, enable the Layer menu and check Use Nodes; add a File Output node and add two additional sockets in the N panel and name them properly. Also, set a path to your map folder.
07. Convert for output
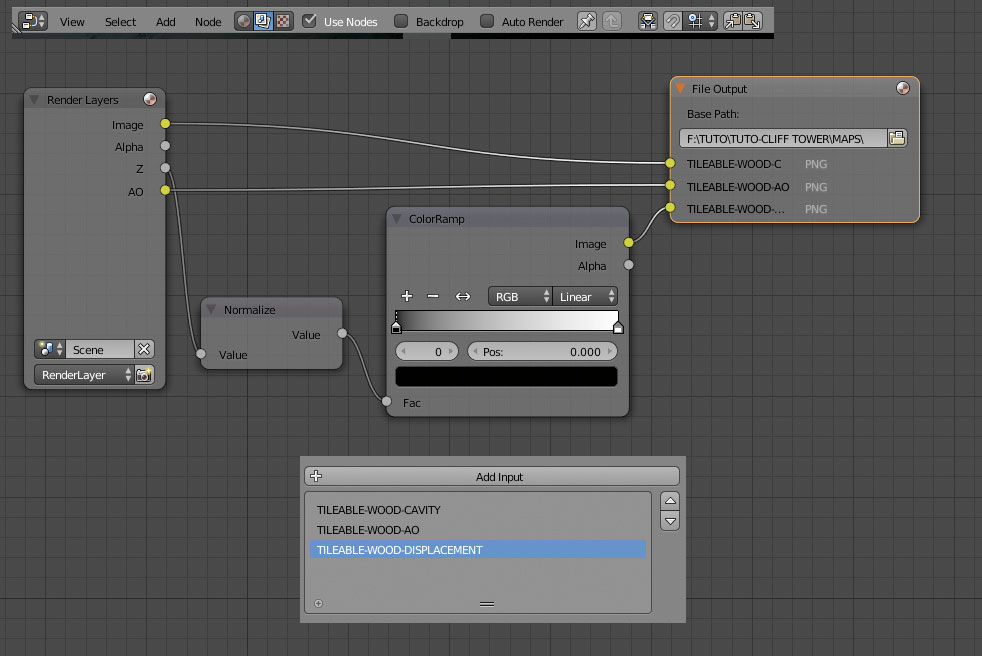
Plug the Z pass in File Output and you'll see a white picture. A Normalise node takes the lowest value output from Z path and sets to 0; the highest to 1. Middle values are taken the same way. Plug the result into a ColourRamp node to convert values to a grey scale image to input in File Output socket.
08. Prepare your object material
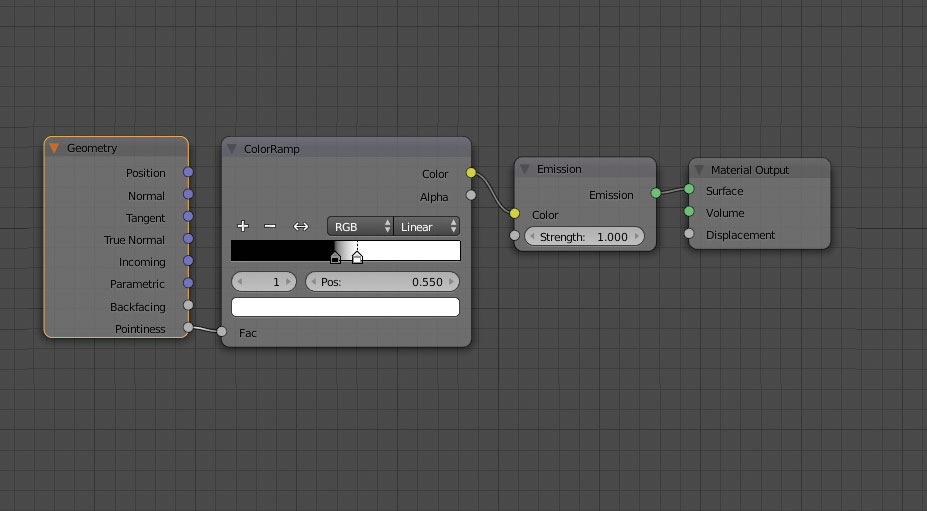
With your sculpted plane selected, go into the Node Editor and create a new material. Now add a Geometry node, a ColourRamp and an Emission shader.
Use the Pointiness output and increase the contrast by moving the black colour ramp flag to 0.45 and the white to 0.55, and plug the result into the Emission shader Colour input. This will allow us to visualise the pointiness or 'cavity' attribute of our object.
Next page: Render your maps and add sculpted rocks
Current page: Page 1
Next Page Page 2
Pierrick is a freelancer 3D artist and founder of P2design. He's a Blender foundation certified trainer and also produces tutorials and digital courses.
Related articles
How To Make A Tileable Texture
Source: https://www.creativebloq.com/how-to/create-stunning-tileable-textures-in-blender
Posted by: claytonwhisconce.blogspot.com
0 Response to "How To Make A Tileable Texture"
Post a Comment